Availability allows faculty to indicate the days, times, location and service for which they are available to meet with students. You can choose to offer this availability for the duration of the current term, or for a set range of dates. You may also offer office hours times, advising times, or both.
A video tutorial on how to do this is also available here.
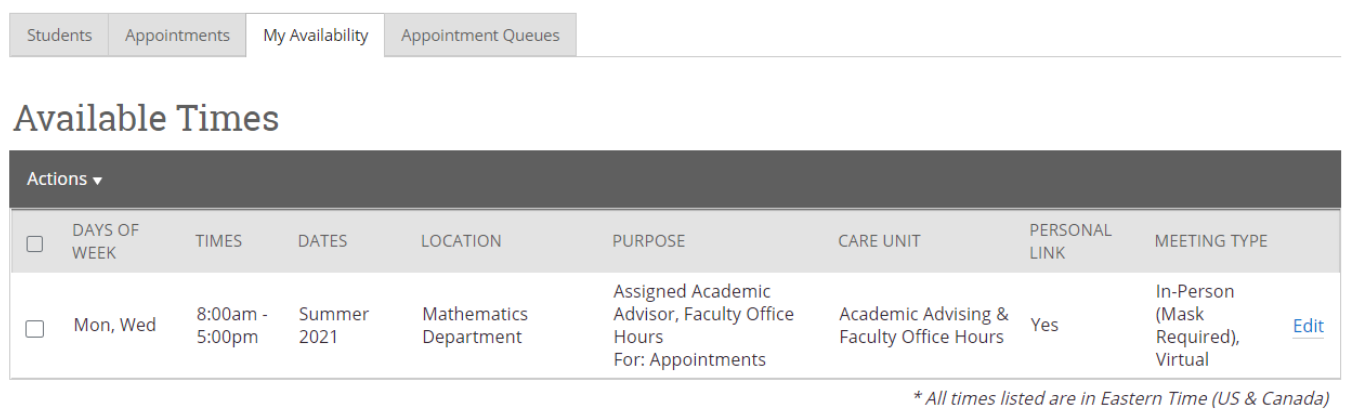
Step 1. Select the “My Availability” tab on your Staff Homepage. When you login to Navigate, your staff homepage will be the default page. If you also teach courses, you will have a Professor Homepage that you can toggle over to by selecting the black triangle to the right of Staff Homepage.
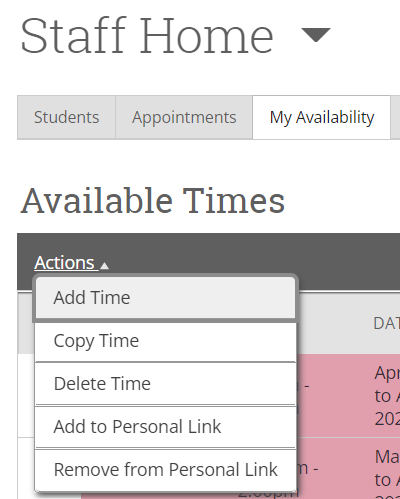
Step 2. Select “Actions” and then “Add Time”. This will bring up the availability window. If there are multiple days with different times that you would like to add, you may need to do this step more than once.
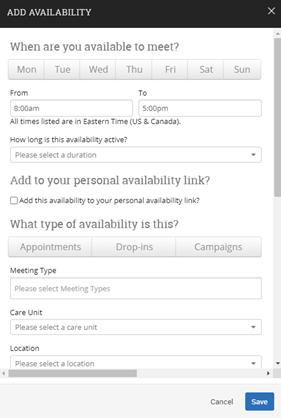
Step 3. Enter you desired information into the Add Availability window. See below for details on what to enter.
When are you available to meet?
-
Select the days of the week for the availability, they will turn grey when selected. Then, enter the time frame for those days. If there is a day with a different time frame, you will need to make a second availability for that. For example, if you office hours on Monday and Wednesday at the same time, those can be included within one availability. If you offer office hours on Tuesday, but at a different time than on MW, you need to add a second availability for that.
How long is the availability active?
-
We recommend you select the current term, but you can select a range of dates instead. Selecting the current term will allow students to make appointments throughout the course of the semester and you will never need to adjust your availability.
Add to your personal availability link?
-
Check this box if you would like to add this availability to your Personal Availability Link that you can provide to students via your email signature or syllabus. In most cases you will check this box for each availability you enter.
-
The Personal Availability Link will be generated and appear below your availability after you have finished entering your times. This link can be provided to students through your email signature, syllabus, etc. and when used, will bring students straight to your availability to schedule with you.
What type of availability is this?
-
Select "Appointments".
-
Note that "Drop-Ins" is only for offices that use kiosks to sign students into appointments, this is not for faculty.
-
Meeting Type
-
Select one, two or all three meeting types depending on how you will be holding appointments. If you would like to offer your office hours/advising meeting times as both in-person and online, select BOTH.
Care Unit
-
Select "Academic Advising & Faculty Office Hours".
Location
-
Select your academic department. Your location will always be your department when entering availability into Navigate.
Services
-
Select "Faculty Office Hours (30-minute)" or "Faculty Office Hours (15-minute)" if this will strictly be for office hours. You may also select BOTH if you'd like student's to be able to choose between the two lengths of appointment. If you are also a faculty advisor, select one or both of the faculty office hours services and add "Assigned Academic Advisor". This will allow students to make appointments with you for office hours, or advising appointments during your office hour times.
-
Note: The faculty office hours services have no scheduling limit (i.e. a student can schedule last minute for office hours). The "Assigned Academic Advisor" service allows ONLY your assigned students to schedule with you and has a scheduling window of 12-hours.
-
URL/Phone Number
-
Depending on how you will be holding your appointments, by phone, in-person or virtually, you can enter your phone number or you virtual office URL here. Otherwise, leave it blank.
Special Instructions for Student
-
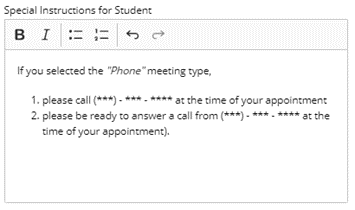
Special instructions are the most important step of the availability. The information you enter here will tell the students about how they will be attending the appointment. After scheduling the appointment, the student will receive a confirmation email that lists the "Additional Details" that you enter here.
-
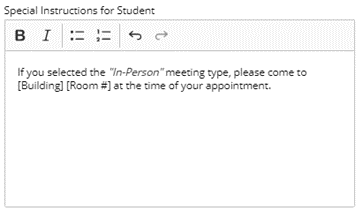
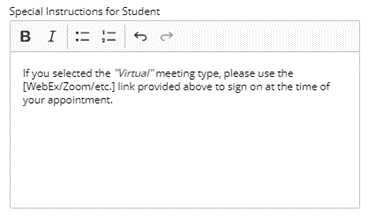
Without the special instructions, students may not know where to access/attend the appointment. See below for a Special Instructions template. Be sure to use one, two or all three of these depending on how many meeting types you added to your availability. If you selected more than one meeting type, you must include instructions for each one.
Option 1 - In-Person:
Option 2 - Virtual:
Option 3 - Phone:
Step 4: Save!
Your availability may change, or you may want to add more times through the semester. To do so, on your “My Availability” tab of your homepage, you can edit an existing availability by selecting the “Edit” option on the right-hand side of the availability.
You can also copy an availability to make a duplicate, and then just adjust the dates and times without having to re-enter all the details. This is useful if you would like to add additional time through the semester. To do this, select the box next to the availability you would like to copy, and then select “Actions” and “Copy Time”.
The time you enter in Navigate should be considered regular availability that you offer throughout the semester, but there will be times where you may have to attend a meeting during your office hours, or where you are ill, out of the office, on vacation, etc.
In these cases, if there is a time that you do not want students to book with you during office hours, you can mark that time as busy in an Outlook event, and when synced, Navigate will recognize that you are busy and will not allow students to book an appointment with you during that busy time. To make use of this, simply add an event in your Outlook calendar and make sure it is marked as “Busy”. Once you have this event marked as “Busy” in your Outlook calendar, Navigate will recognize that your are busy during a time that you usually offer office hours to students, and will not make that time available for students to choose from.
Syncing also happens from Navigate to Outlook, so any appointments students make with you through Navigate will also sync to your Outlook calendar so that you can see Navigate appointments in Outlook.
You only need to sync your calendar once, then it will continue syncing. If you have not synced your Outlook calendar before, please see our video tutorial, or see the step-by-step tutorial.
Once you set your availability, as mentioned above, you have the option to include each of your availabilities within your Personal Availability Link, also known as your PAL. When you include an availability in your PAL, the link will be generated and displayed below your availability.
The PAL will bring students directly to your availability, and eliminate steps previously needed to pick what type of appointment they are scheduling and what service they are looking for. Instead, they will be brought straight to the times that you are available for the service that you chose to offer, significantly reducing the number of steps a student needs to make to schedule with you.
- The first way a student can make an appointment with you is by using your Personal Availability Link that you can provide to students. This link will bring students straight to your availability, and will eliminate the initial steps a student must take to find you in the scheduler.
- The second way that a student can make an appointment is by logging into Navigate and using the blue “Make an Appointment” button on their homepage. They will then select “Academic Advising & Faculty Office Hours”, and then choose from either “Assigned Academic Advisor, or Faculty Office Hours” depending on what you offered as services. If they choose Assigned Academic Advisor, they will be brought straight to you. If they choose Faculty Office Hours, they will need to choose your name from a list of staff, or search for you.
Appointment Length for Faculty Office Hours and Assigned Academic Advisor appointments is pre-set by site administrators, individuals cannot adjust the appointment length. Faculty Office hours provides two service options, 15 or 30-minutes. Assigned Advisor appointments will be 30-minutes long. If a student requests more time than what you've offered, they can book two back-to-back appointments.