Appointment Summaries and Notes are two useful methods of adding information to a student's Navigate record. They are used to record information relevant to the student's academic success and should NOT include any personal, opinionated or private information about the student.
Appointment summaries are used to document any type of meeting with a student whether it be scheduled, or drop-in. Notes are any general record you would like to record for a student such as phone/email conversations that are not associated with a specific meeting. Please be sure to write each accordingly.
Please review the appropriate uses of Appointment Summaries and Notes outlined in our Guidelines for Appointment Summaries & Notes prior to utilizing them in Navigate.
Please read our guidelines prior to writing appointment summaries.
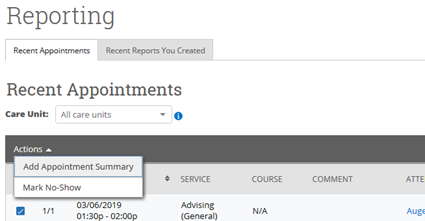
If you wish to write an appointment summary for an appointment that was scheduled through Navigate, select the "Appointments" tab on your homepage. Here you will see a list of your recent appointments under “Reporting” at the bottom of the page. Use the Actions drop down to select either Add Appointment Summary or Mark as No Show. If you mark as no show, you will have the opportunity to add any additional information about the no show to the summary (i.e. Student emailed/phoned to cancel, student did not show or cancel).
For advising appointments, when writing the appointment summary, be sure to include major points of discussion (i.e. planned courses, discussions about academic warning/probation, planned minor, review of DE/What if). If you do not give the student a PIN for some reason, please note that and the reason in the report (i.e. Student reports they want to change major to SOC, referred them to SOC for advisement and PIN).
Please read our guidelines prior to writing appointment summaries.
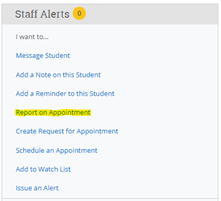
If you wish to write an appointment summary for an appointment that was an impromptu meeting and was NOT scheduled through Navigate, then you should open the student’s profile and use the “Report on Appointment” option from the quick menu on the right-hand side of the student’s profile. Doing this creates a new appointment instance and adds the appointment summary report all in one.
If the appointment was over the phone/via email, in-person, or virtual, you can specify this under the "Meeting Type" portion of the appointment summary.
For advising appointments, when writing the appointment summary, be sure to include major points of discussion (i.e. planned courses, discussions about academic warning/probation, planned minor, review of DE/What if). If you do not give the student a PIN for some reason, please note that and the reason in the report (i.e. Student reports they want to change major to SOC, referred them to SOC for advisement and PIN).
Note: If you create an appointment summary report by selecting “Report on Appointment” from a student’s profile for a scheduled appointment this will create a duplicate of the existing appointment. Always use “Recent Appointments” to write appointment summary reports for scheduled appointments to avoid this.
Please read our guidelines prior to adding a note in Navigate.
To add a note to a single student, open Navigate to the student's Overview Page (by using the Quick Search). On the right-hand side of the page, you will see the following box.
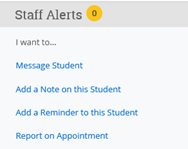
Select "Add Note on this Student". From here you can cut and paste an email exchange into the note or provide an overview of a conversation or phone call you had with the student.
Please read our guidelines prior to adding a note in Navigate.
To add a note to a group of students, which can be useful when managing a group advisement session or workshop, select the Advanced Search option from the left-side tool bar and create a search to find the students who attended. If you have a list of students by name, email or Student ID, you can copy and paste the list into the search box and then click "Search".
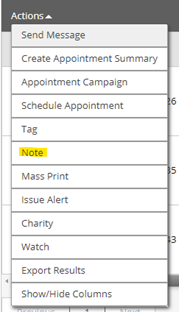
From here, you can select the "ALL" button and then move to the Action menu and choose "Note".
From here you can cut and paste an email exchange into the note or provide an overview of a conversation/phone call you had with the student.