The Advanced Search function within Navigate allows you to search for a cohort of students based on various search parameters, such as minor, major, GPA, admit term, and many more. You can find the Advanced Search tab by clicking the magnifying glass icon from the left side toolbar.
The Advanced Search function with Navigate allows you to search for a cohort of students based on various search parameters, as shown below. You can find the Advanced Search tab by clicking the magnifying glass icon from the left side tool bar.
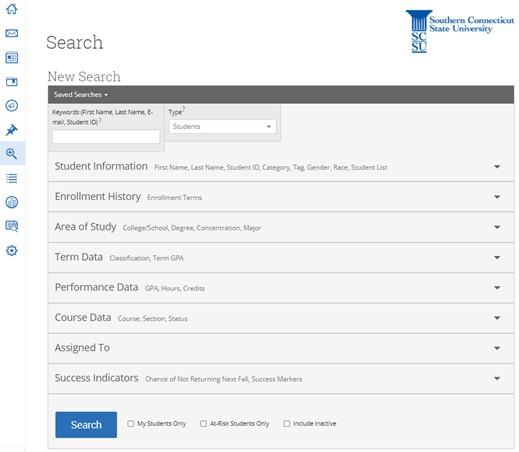
To create an advanced search, you just select the search parameters that you are interested in and click the “Search” button below. The advanced search takes Banner data and presents it in a way that's more easily searchable. All Navigate data is 1-day-old Banner data. Some of these may be fields in which a drop-down menu is available to choose from, such as Area of Study, or you may need to enter free text. You also have the option to select one or more of the following:
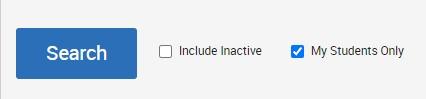
My Students Only will limit the possible results to only your assigned students, meaning students who are assigned to you in Banner as you being their advisor.
Include Inactive will expand the possible results to both active and inactive students. By default, the search results only display users who are active in the currently selected term. You should NOT select this, unless searching for students who have recently graduated.
Note: If you are searching for graduate students only, you can use the "Classification (In Any of These)" area under the Term Details bucket, or by simply filtering for certain degrees under the Area of Study bucket. Similarly, you can filter out graduate students.
Note: Minors can be searched via the "Categories (In Any of These)" option under the Student Information bucket in the advanced search.
After creating an Advanced Search, you have the option to save the search. Saved Search allows users to conduct a pre-configured Advanced Search without having to manually and repeatedly create a new Advanced Search. Unlike Student Lists, which save a static list of the same students, a Saved Search dynamically regenerates a list of students or users based on the search criteria.
You can create a saved search via the Advanced Search feature. After selecting your search parameters and running the search, click on the 'Save' button at the top of the screen.

After selecting "Save", you must name your search. Always make the name as specific as possible. For example, if you create an advanced search of all mathematics majors, make sure to save it as something like “FA 2019 Math Majors” as opposed to just “Math Majors”. Then, select "Save Search" and you are done.
To view your saved search, select the "Lists & Saved Items" option from the left side toolbar, which is the bulleted-list icon.
Once you have entered you search parameters in Advanced Search and have selected Search, you have the option to export your results into an excel document.
The example below is an advanced search of Mathematics Majors with a 3.0 cumulative GPA, going for Degree: Bachelor of Arts and minimum credits earned of 30. To have this search exported as an excel document, simply select the "ALL" option below the Actions menu, and then click "Actions" to bring up the drop-down, which will include "Export Results".
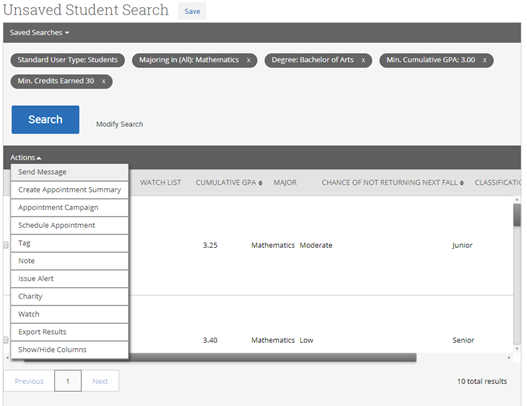
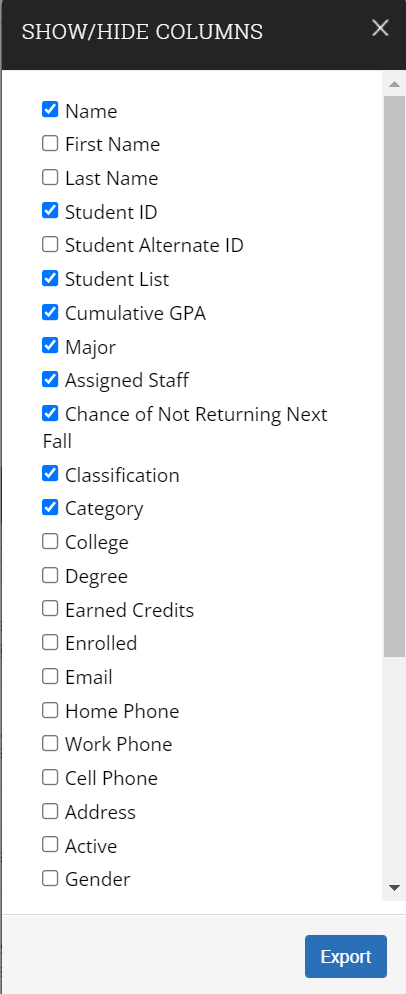
From here, the "Export Results Columns" menu will appear. This is where you can choose what information you wish to be included in the exported document. If you, for example, don’t need to see the student’s home phone or address in this report, simply uncheck the box next to that item. Once you have the correct criteria selected, click "Export".
Once the report has been created, you will see a yellow bar at the top of your screen that says, "New Exported Search ready!". The document should auto-download. Otherwise, select the "Download Center for Reports" link to access the tab with the document. All exported document from Navigate will remain here for 30 days after being exported.
In the Download Center for Reports, select the most recent search to download a copy of the excel document onto your computer.
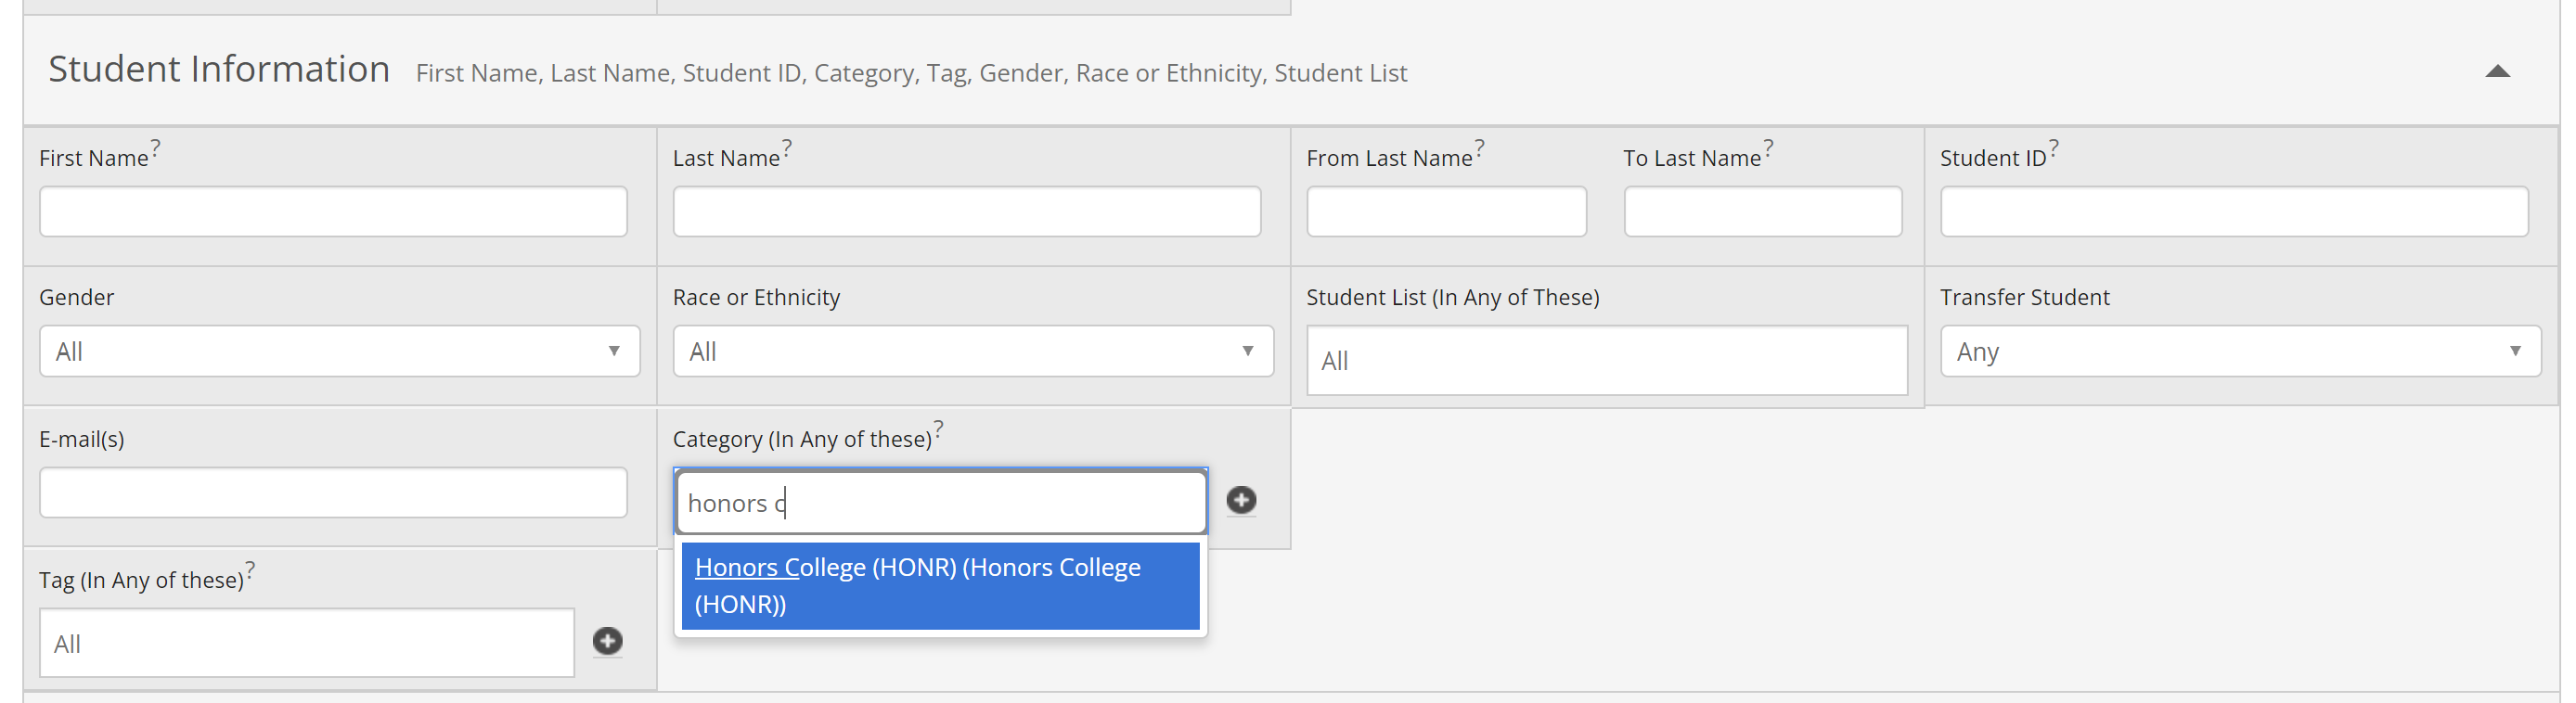
Within the advanced search, housed under the "Student Information" bucket, you will see the "Categories (In Any of These)" option. Here, we list some of the search parameters which fall under the categories area in Navigate. Generally speaking, if there is information we'd like to filter by in Navigate, that doesn't already have a 'home' in the Advanced search, it will fall under categories.
-
Minor
-
Degree Status
-
UG Degree Status: Awarded [Term]
-
UG Degree Status: Pending Final Grades [Term]
-
UG Degree Status: In Review for Graduation [Term]
-
GR Degree Status: Awarded [Term]
-
GR Degree Status: Pending Final Grades [Term]
-
GR Degree Status: In Review for Graduation [Term]
-
-
Admitted [Term]
-
Early College
-
First Gen
-
First-Semester Freshman
-
Fresh Start: [Term]
-
High School Language Level
-
High School [Language] Level 1
-
High School [Language] Level 2
-
High School [Language] Level 3
-
-
Honors College
-
Leave of Absence-[Term]
-
MAT Placement:[placement level]
-
Minority Student
-
Out of State
-
Readmitted:[Term]
-
Residence Hall
-
Residence Hall (ResdAll)
-
Residence Hall: [Hall]
-
-
Student Athlete
-
Student Athlete: (all)
-
Student Athlete: [Sport]
-
Use this approach to an Advanced Search to find all students who are currently in any major(s) for a given term. You can also narrow this down by concentration as well.
Step 1. Navigate to the Advanced Search page by using the magnifying glass icon in the left-hand side toolbar.
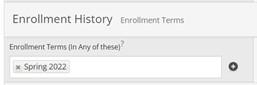
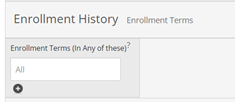
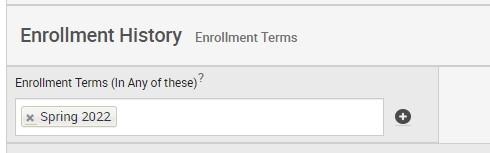
Step 2. Select the “Enrollment History” bucket and under “Enrollment Terms (In Any of These)” enter the term you are interested in finding students for. We will use “Spring 2022”.
Note: This searches for students enrolled in the current term. You always want to include an enrollment term, otherwise you may get students in your list who are not currently, or are no longer at SCSU.
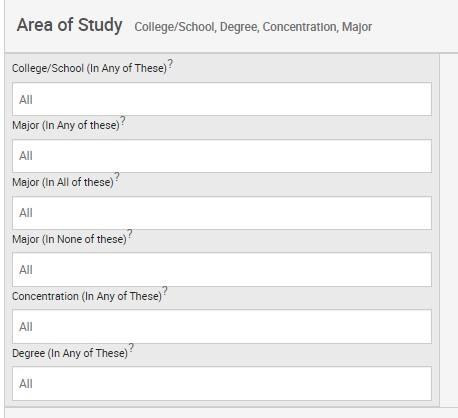
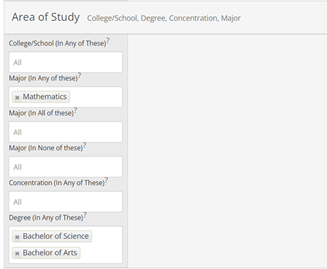
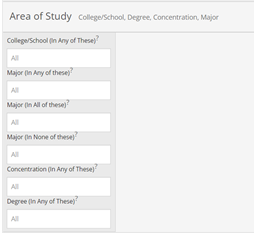
Step 3. Select the "Area of Study" bucket. Here, you can filter by major and degree. If you'd like to get even more detailed, you also have the option to filter by concentration. Be sure to include at least Major and Degree, to ensure you are looking at either UG or GR students within your desired major(s).
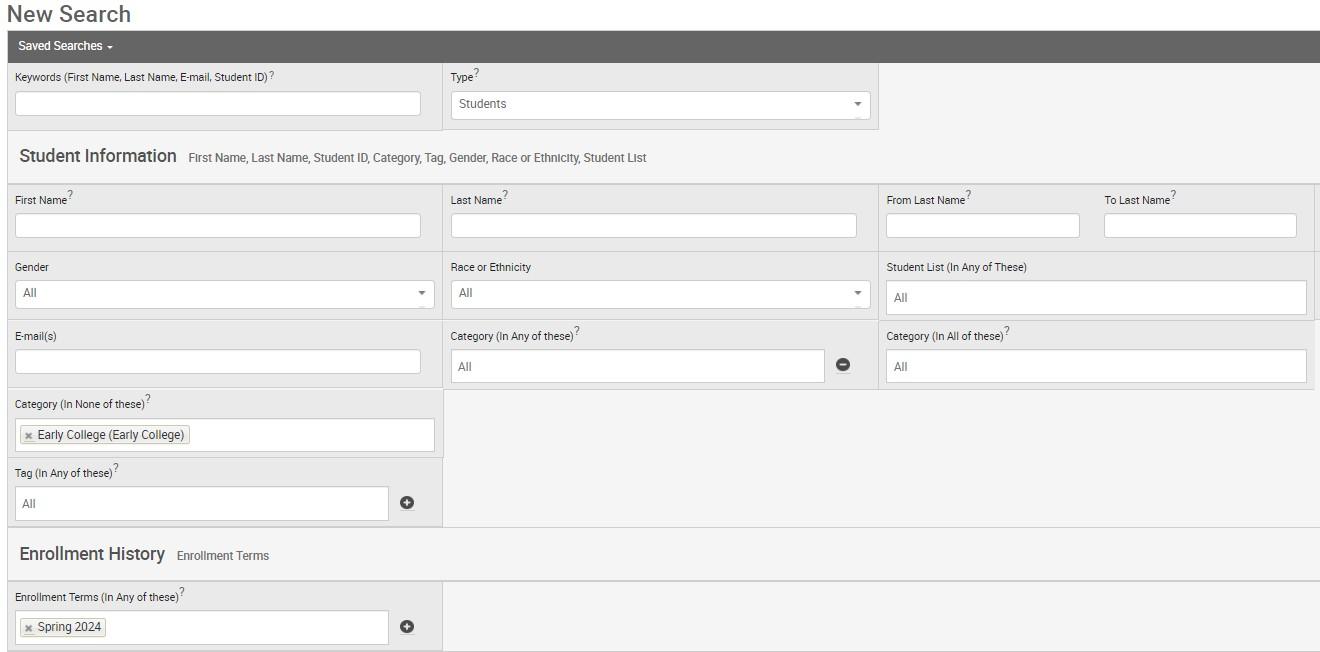
Step 4 (Optional). If you are looking to find current students for Spring, this search will include Early College students, who are currently enrolled in Spring as an early college student, but are not yet in your program until Fall. To exclude early college students, follow these steps: Select the “Student Information” bucket and then the + next to “Categories”. That will open the “Categories (In None of These)” option. In the “Categories (In None of These)” spot, enter “Admitted [Semester] [Year]” for the next upcoming term (specifically Fall or Spring). In our case, we were searching for Spring 2022 students, so we’ll enter “Admitted Fall 2022”. This will exclude current Early College students, who will be in that major(s) in the coming term, but are not yet.

Step 5. Search!
Note: The "Actions Menu" is very useful when doing outreach.
-
You can save this search to re-run later. See the "Saving a Search" section above.
-
You can export this search to excel. See the "Exporting a Search" section above.
-
You can send an email to the students in this list. See "Emailing from a List" here.
Use this approach to an Advanced Search to find all students who are currently in any major(s) for a given term. You can also narrow this down by concentration as well.
Step 1. Navigate to the Advanced Search page by using the magnifying glass icon in the left-hand side toolbar.
Step 2. Select the “Enrollment History” bucket and under “Enrollment Terms (In Any of These)” enter the term you are interested in finding students for.
Note: This searches for students enrolled in the current term. You always want to include an enrollment term, otherwise you may get students in your list who are not currently, or are no longer at SCSU.
Step 3 (Optional). Select the “Student Information” bucket and then the + next to “Categories”. That will open the “Categories (In None of These)” option. In the “Categories (In None of These)” spot, enter “Early College”. This will exclude current Early College students, who will be in that major(s) in the coming term, but are not yet.
Step 4. Next, we want to look at first-year students only. To do this, we will filter by total earned credits. Select the "Performance Data" bucket and under "Max. Credits Earned" enter "30". The search will then return students with 30 or less credits. Note that credits earned includes both transfer and SCSU credits.
Note: You also have the ability to filter by admit term (under Student Information -> Categories) or by classification (under Term Details) if needed.
Step 5. Search!
Note: The "Actions Menu" is very useful when doing outreach.
-
You can save this search to re-run later. See the "Saving a Search" section above.
-
You can export this search to excel. See the "Exporting a Search" section above.
-
You can send an email to the students in this list. See "Emailing from a List" here.
Use this approach to an Advanced Search to find all students who are currently in any major(s) for a given term. You can also narrow this down by concentration as well.
Step 1. Navigate to the Advanced Search page by using the magnifying glass icon in the left-hand side toolbar.
Step 2. Select the “Enrollment History” bucket and under “Enrollment Terms (In Any of These)” enter the term you are interested in finding students for.
Note: This searches for students enrolled in the current term. You always want to include an enrollment term, otherwise you may get students in your list who are not currently, or are no longer at SCSU.
Step 3 (Optional). Select the “Student Information” bucket and then the + next to “Categories”. That will open the “Categories (In None of These)” option. In the “Categories (In None of These)” spot, enter “Early College”. This will exclude current Early College students, who will be in that major(s) in the coming term, but are not yet.
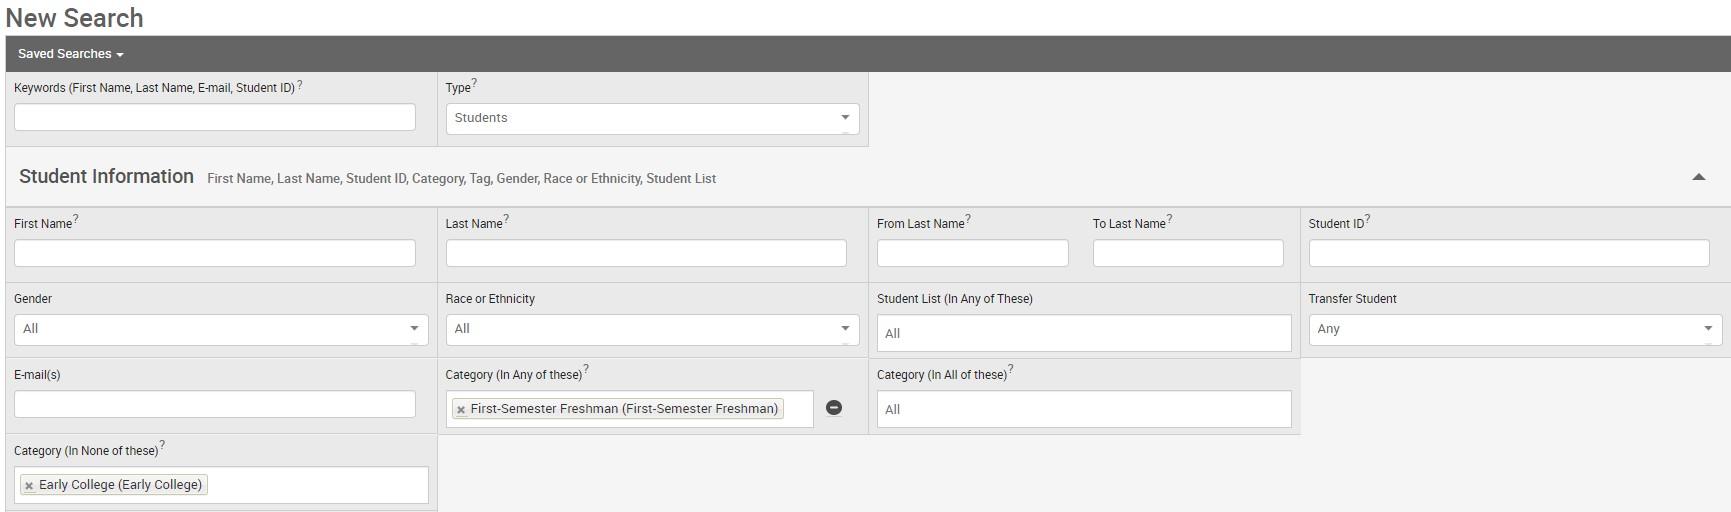
Step 4. Next, we want to look at first-semester freshman only. To do this, we need to select the "Student Information" bucket again. Under "Category (In Any of These)", enter "First-Semester Freshman".
Note: You can also filter by credits to see first-YEAR students instead, see "First-Year Students by Major" above.
Note: You also have the ability to filter by admit term (under Student Information -> Categories) or by classification (under Term Details) if needed.
Step 5. Search!
Note: The "Actions Menu" is very useful when doing outreach.
-
You can save this search to re-run later. See the "Saving a Search" section above.
-
You can export this search to excel. See the "Exporting a Search" section above.
-
You can send an email to the students in this list. See "Emailing from a List" here.
Use this approach to an Advanced Search to find all students who are currently in any minor(s) for a given term.
Step 1. Navigate to the Advanced Search page by using the magnifying glass icon in the left-hand side toolbar.
Step 2. Select the “Enrollment History” bucket and under “Enrollment Terms (In Any of These)” enter the term you are interested in finding students for. We will use “Spring 2022”.
Note: This searches for students enrolled in the current term. You always want to include an enrollment term, otherwise you may get students in your list who are not currently, or are no longer at SCSU.
Step 3. Select the “Student Information” bucket and then under "Categories (In Any of These)" you can type "Minor - [Name of Minor]" to select the minor(s) you are looking to find.

Step 4. Search!
Note:
-
You can save this search to re-run later. See the "Saving a Search" section above.
-
You can export this search to excel. See the "Exporting a Search" section above.
-
You can send an email to the students in this list. See "Emailing from a List" here.
Use this approach to an Advanced Search to find all students who are going to graduate in a future semester. You can narrow this search down to be all graduating within a school, major, etc.
If you are doing this search to find students who have already been awarded their degrees for a given semester, use the following steps.
Step 1. Navigate to the Advanced Search page by using the magnifying glass icon in the left-hand side toolbar.
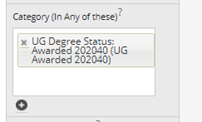
Step 2. Select the “Student Information” bucket to open it up and enter “UG Degree Status: Awarded [Term Code]” to find undergraduate students or “GR Degree Status: Awarded [Term Code]” to find Graduate students within the “Categories (In Any of These)” area to find students who graduated that term.
If you are unsure of the Term Code, i.e. [Academic Year][Semester Code] to enter, use the following:
Enter the academic year followed by the semester code. [Term Code]=[Academic Year][Semester Code]:
-
Spring – 40
-
Summer – 50
-
Fall – 10
-
Winter – 20
Example: The [Academic Year][Semester Code] you should enter after the degree status is as follows:
-
Fall: Next Year +10 Fall '21: 202210
-
Winter: Year + 20 Winter '21-'22: 202220
-
Spring: Year + 40 Spring '22: 202240
-
Summer: Year + 50 Summer '22: 202250
So, all the semesters within the 2021-2022 academic year are listed as 2022.
(Our example is UG students awarded their degree in Spring 2020)
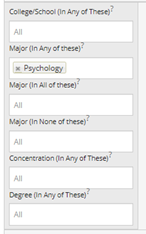
Step 3. Select the “Area of Study” bucket to open it. Here is where you can specify a college/school, major, etc. Enter the desired school/major(s) you are interested in.
For this example, we will search for all Psychology majors. Note that in step 2 we chose UG Degree Status: Awarded 202040, so we are already looking at UG degrees awarded. Therefore, in our example, we will get UG Psychology students who were awarded their degree in Spring 2020.
Step 4. Select the “Include Inactive” button found to the right of the “Search” button. Once a student graduates, they are marked as inactive and therefore will not appear in the search unless this option is checked.
Step 5. Search!
Note:
-
You can save this search to re-run later. See the "Saving a Search" section above.
-
You can export this search to excel. See the "Exporting a Search" section above.
-
You can send an email to the students in this list. See "Emailing from a List" here.
Use this approach to an Advanced Search to find all graduating students in a given semester. You can narrow this search down to be all graduating within a school, major, etc.
If you are doing this search to find students who will be graduating, but have not yet been awarded their degrees, you will use the following steps.
Step 1. Navigate to the Advanced Search page by using the magnifying glass icon in the left-hand side toolbar.
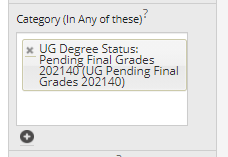
Step 2. Select the Student Information bucket to open it up and use the “Categories (In Any of These)” area.
You have the following two options to find students who will be graduating:
“UG Degree Status: In Review for Graduation [Term Code]” OR UG “Degree Status: Pending Final Grades [Term Code]” (the same applies for GR Degree Status).
A student is marked as “In Review for Graduation” when they have completed 75% of their program requirements.
A student is marked as “Pending Final Grades” when they have completed 98% of their program requirements, meaning the student’s final requirements are in progress.
When looking to find students graduating for the current term, you should use pending final grades. When looking for students graduating in a future term, you should use in review for graduation.
If you are unsure of the Term Code, i.e. [Academic Year][Semester Code] to enter, use the following:
Enter the academic year followed by the semester code. [Term Code]=[Academic Year][Semester Code]:
-
Spring – 40
-
Summer – 50
-
Fall – 10
-
Winter – 20
Example: The [Academic Year][Semester Code] you should enter after the degree status is as follows:
-
Fall: Next Year +10 Fall '21: 202210
-
Winter: Year + 20 Winter '21-'22: 202220
-
Spring: Year + 40 Spring '22: 202240
-
Summer: Year + 50 Summer '22: 202250
So, all the semesters within the 2021-2022 academic year are listed as 2022.
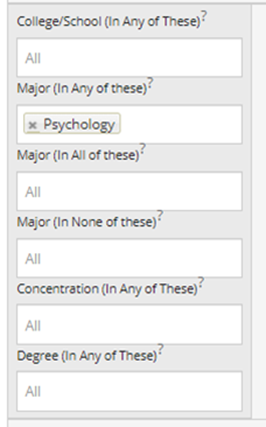
Step 3. Select the “Area of Study” bucket to open it. Here is where you can specify a college/school, major, etc. Enter the desired school/major(s) you are interested in.
For this example, we will search for all Psychology majors. Note that in step 2 we chose UG Degree Status: Pending Final Grades 202140, so we are already looking at UG degrees. Therefore, in our example, we will get UG Psychology students who are enrolled in their final program requirements for Spring 2021.
Step 4. Search!
Note:
-
You can save this search to re-run later. See the "Saving a Search" section above.
-
You can export this search to excel. See the "Exporting a Search" section above.
-
You can send an email to the students in this list. See "Emailing from a List" here.
You can use Navigate to find any currently enrolled students who are not yet registered for the coming semester. This search will exclude students who will be graduating and students that will be on a leave of absence. The search will return just students who should be registered for the coming semester but are not yet.
Step 1. Navigate to the Advanced Search page by using the magnifying glass icon in the left-hand side toolbar.
Step 2. Under the “Enrollment History” bucket, select the small “+” icon, this will expand your selections.
Then, in “Enrollment Terms (In Any of These)” enter the current term, for our example “Fall 2021”. Then, under “Enrollment Terms (In None of These)” enter the upcoming term, for our example “Spring 2022”. This will filter to look for students currently enrolled, who are not yet enrolled in the upcoming semester.

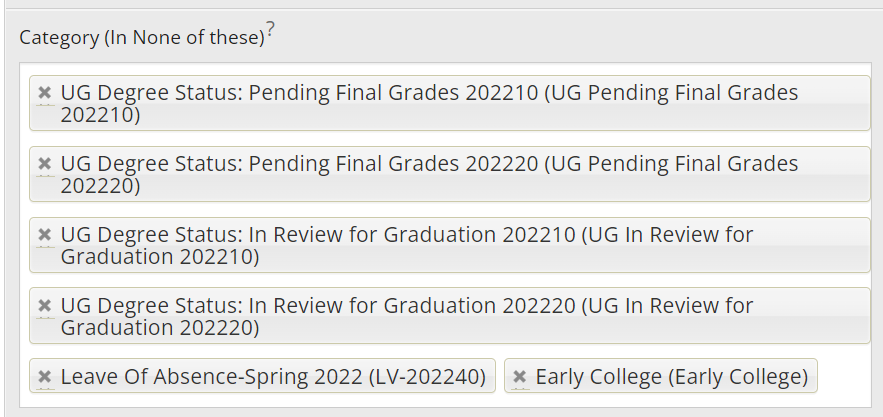
Step 3. In the Student Information bucket, under “Category (In Any of These)” area, select the small “+” icon. This will open up the “Category (In None of These)” option, where you can exclude certain groups of students.
Then, in “Category (In None of These)” enter the “Degree Status: Pending Final Grades [Term Code]” for students graduating in the current term and “Degree Status: In Review for Graduation [Term Code]” for students graduating during the winter or summer term. You will need to enter for UG and GR if you are pulling both lists.
Note: The goal here is to exclude students who have recently graduated, or will be graduating, so the specific terms to use, as well as Pending Final Grades, Awarded and In Review for Graduation will vary depending on the time of year in which you are running the report.
If you are unsure of the Term Code, i.e. [Academic Year][Semester Code] to enter, use the following:
Enter the academic year followed by the semester code. [Term Code]=[Academic Year][Semester Code]:
-
Spring – 40
-
Summer – 50
-
Fall – 10
-
Winter – 20
Example: The [Academic Year][Semester Code] you should enter after the degree status is as follows:
-
Fall: Next Year +10 Fall '21: 202210
-
Winter: Year + 20 Winter '21-'22: 202220
-
Spring: Year + 40 Spring '22: 202240
-
Summer: Year + 50 Summer '22: 202250
So, all the semesters within the 2021-2022 academic year are listed as 2022.
Step 4. In “Student Information” bucket, in the same “Category (In None of These)” area enter “Leave of Absence-Spring 2022” (or the upcoming semester you are interested in) and "Early College". This omits students who are on a leave of absence, or are ECE students not yet in your program.
Step 5. In the “Area of Study” bucket, enter the major(s) and degree(s) of the students you are interested in finding enrollment information for.
Step 6. Search!
You will obtain a list of students currently enrolled, who have not enrolled in the upcoming term that are not graduating and will not be on a leave of absence. You can export this list to excel by following the steps outlined in "Exporting a Search" above.
Note: If a student has a registration hold, this will be listed in the results under “Categories” as “Registration Hold (Registration Hold)”.
If you would like to search for the students who have registration holds, simply add “Registration Hold (Registration Hold)” in your search under “Student Information” and “Categories (In Any of These)”.
Note:
-
You can save this search to re-run later. See the "Saving a Search" section above.
-
You can export this search to excel. See the "Exporting a Search" section above.
-
You can send an email to the students in this list. See "Emailing from a List" here.
You can use the Advanced Search feature of Navigate to find a list of new incoming transfer students for any major or set of majors. See instructions below on how to find this list.
Step 1. Navigate to the Advanced Search page by using the magnifying glass icon in the left-hand side toolbar.
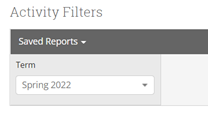
Step 2. If you chose the Student Info report, select the term you are interested in as the “Activity Filter” term.
If you chose the Advanced Search, in the “Enrollment History” bucket, under “Enrollment Term (In Any of These)” enter the term you are interested in. For our example we will be using “Spring 2022”.
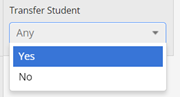
Step 3. Under the “Student Information” bucket, select Transfer Student then “Yes” to see only transfer students.
Step 4. Under the “Student Information” bucket, then “Categories (In Any of These)” enter “Admitted [Semester] [Year]” for the term you are interested in.

Step 5. Under the “Area of Study” bucket, add the major(s) and degree(s) you are looking for.
If you only want to see undergraduate students, adding the undergraduate degrees here will ensure you do not return any graduate students in your search.
Step 6. Search!
Note:
-
You can save this search to re-run later. See the "Saving a Search" section above.
-
You can export this search to excel. See the "Exporting a Search" section above.
-
You can send an email to the students in this list. See "Emailing from a List" here.
You can use the Advanced Search feature of Navigate to find a list of students registered for a certain course, or certain course and section for any given semester. Please see the instructions below on how to find this list.
Step 1. Navigate to the Advanced Search page by using the magnifying glass icon in the left-hand side toolbar.
Step 2. Select the "Course Data" bucket.
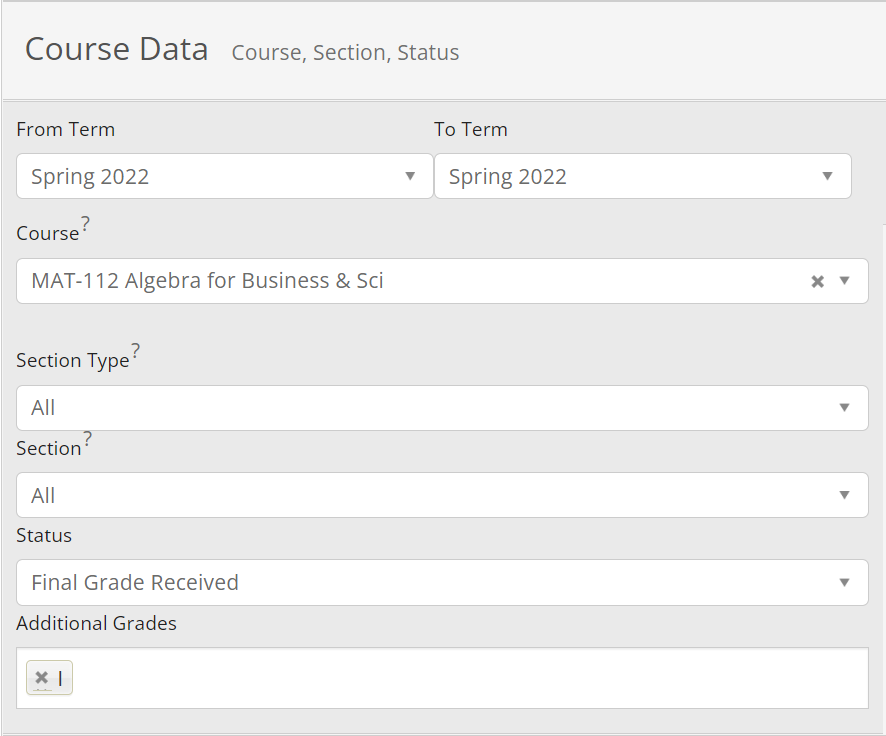
Step 3. Enter the desired criteria for the course in which you want a list of enrolled students. See below.
-
From Term & To Term: These should BOTH be the term you are interested in finding the list for. This will default to the current term.
-
Course: Enter the course.
-
Note: Courses are written with a dash ("-") between the course acronym and number.
-
-
Section Number: Enter the section of the course in which you'd like the roster, unless you'd like ALL students in the course across multiple sections.
-
Status: This will default to "Registered". Leave this as-is.
Step 4. Search!
Note:
-
You can save this search to re-run later. See the "Saving a Search" section above.
-
You can export this search to excel. See the "Exporting a Search" section above.
-
You can send an email to the students in this list. See "Emailing from a List" here.
You can use the Advanced Search feature of Navigate to find a list of students who ended a course with a specific final grade. In this case, we explain how to find a list of students who received an "I" as a final grade for a given course.
Note: If you are looking to find a list of students, with their final grades as an exportable column, you should be using the Student Enrollments report. The advanced search will give the list of students who received an "I", but will not have a column which lists the grade.
Step 1. Navigate to the Advanced Search page by using the magnifying glass icon in the left-hand side toolbar.
Step 2. Select the "Course Data" bucket.
Step 3. Enter the desired criteria for the course in which you want this list. See below.
-
From Term & To Term: These should BOTH be the term you are interested in finding the list for.
-
Course: Enter the course.
-
Note: Courses are written with a dash ("-") between the course acronym and number.
-
-
Section Number: Enter the section of the course in which you'd like the roster, unless you'd like ALL students in the course across multiple sections.
-
Status: Change this to "Final Grade Received".
-
Additional Grades: Enter "I".
Step 4. Search!
Note:
-
You can save this search to re-run later. See the "Saving a Search" section above.
-
You can export this search to excel. See the "Exporting a Search" section above.
-
You can send an email to the students in this list. See "Emailing from a List" here.
You can use the Advanced Search feature of Navigate to find a list of students who have the "honors college" attribute in Banner.
Step 1. Navigate to the Advanced Search page by using the magnifying glass icon in the left-hand side toolbar.
Step 2. Under the "Student Information" bucket and then "Categories (In Any of These)" enter "Honors College".
Step 3. Under the "Enrollment History" bucket, enter the current term to ensure you are getting current Honors College students.
Step 4. Search!
Note:
-
You can save this search to re-run later. See the "Saving a Search" section above.
-
You can export this search to excel. See the "Exporting a Search" section above.
-
You can send an email to the students in this list. See "Emailing from a List" here.
You can use the Advanced Search feature of Navigate to find a list of students who have been assigned to you, or any faculty advisor in Banner as a Major Advisor, Minor Advisor or Secondary Major Advisor. This search is meant to give you one list, per advisor.
Step 1. Navigate to the Advanced Search page by using the magnifying glass icon in the left-hand side toolbar.
Step 2. Select the “Enrollment History” bucket and under “Enrollment Terms (In Any of These)” enter the term you are interested in finding students for. We will use “Spring 2022”.
Note: This searches for students enrolled in the selected term. You always want to include an enrollment term, otherwise you may get students in your list who are not currently, or are no longer at SCSU.
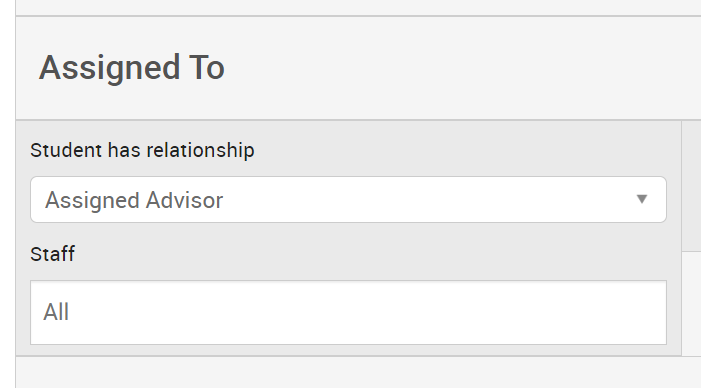
Step 3. If you are looking for your own assigned students, select the "My Students Only" check box to the right of the search button. Alternatively, if you are looking to find the assigned students for someone else, select the "Assigned To" bucket. Here you can enter the relationship of Minor Advisor, Assigned Advisor, or Secondary Assigned Advisor as well as the Staff name of the advisor who you are looking to find the list of students for.
Step 4. Search!
Note:
-
You can save this search to re-run later. See the "Saving a Search" section above.
-
You can export this search to excel. See the "Exporting a Search" section above.
-
You can send an email to the students in this list. See "Emailing from a List" here.
You can use the Advanced Search feature of Navigate to find a list of students and with each student, their assigned major advisor, secondary major advisor, or minor advisor. This is especially useful when trying to find all students in a certain major, listed with their assigned advisor(s).
Step 1. Navigate to the Advanced Search page by using the magnifying glass icon in the left-hand side toolbar.
Step 2. Select the “Enrollment History” bucket and under “Enrollment Terms (In Any of These)” enter the term you are interested in finding students for. We will use “Spring 2022”.
Note: This searches for students enrolled in the selected term. You always want to include an enrollment term, otherwise you may get students in your list who are not currently, or are no longer at SCSU.
Step 3. Under the “Area of Study” bucket, add the major(s) and degree(s) you are looking for. You may also add any other search parameters you are interested in during this step.
If you only want to see undergraduate students, adding the undergraduate degrees here will ensure you do not return any graduate students in your search.
Step 4. Search!
Note: Once you have hit search, you will obtain a list of students based on the major, degree, etc. information that you entered in the previous step. If you do not already see a column listing the each student's assigned advisor(s), select "Actions" and then "Show/Hide Columns". A pop-up will appear that will show you all columns of information available about a student from the advanced search. The column which lists assigned advisor(s) is titled "Assigned Staff". Each of these columns are also exportable.
Note:
-
You can save this search to re-run later. See the "Saving a Search" section above.
-
You can export this search to excel. See the "Exporting a Search" section above.
-
You can send an email to the students in this list. See "Emailing from a List" here.